Dry Aging Thai Beef for a Delicious Steak
Why Dry Age Thai Beef?
Thai Beef has a notorious reputation of being nearly inedible. You can find many tricks to make it more appealing but nothing can make a good steak from Thai Beef…. until now. Dry Aged Steaks is the Cadillac of steaks no matter what cut is used. Without going into details as to why this is, dry aging is the process of aging a large primal (uncut) part of the cow for 27+ days. In the past, this required a special refrigerator set at a specific temperature and humidity. Thai Artisan Foods has imported a special aging bag called the Umai Dry Aging Bag that permits you to dry age in any standard refrigerator. The results are amazing! Let’s go though the complete process.
You Only Need 3 Things for Dry Aging Steaks.
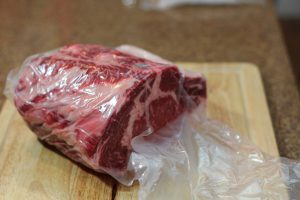
 In reality, you probably have everything you need except 2 items. The primal beef and the Umai Dry Aging Bag. To start it off, you need a medium size bucket for water, the Umai Dry Aging Bag, and a primal cut of beef. In our case, we got a Strip Loin from the local market at 230b per kilo. You might have to ask a day or 2 in advance to get a whole primal cut.
As you can see in the photo, the butcher still took a slice from one end. We still took this primal anyways since it looked like a good cut. This was a 6.2kg Strip Loin with a nice layer of fat on top. The price at my market was 230b per kilo. Compared to 400+ baht per kilo of Aussie beef at Makro.
Immersion Sealing
 There are 2 ways to seal the meat into the Umai Dry Aging Bag. 1) Vacuum Seal. 2) Immersion Seal.
As the name suggests, vacuum sealing requires you to have a vacuum sealer. Most people don’t have one. I use the immersion sealing method. This only requires a bucket of water. I personally prefer this method since I think it creates a better seal and you can re-use the bag if you want to.
All you need to do is place the strip loin into the bag (without any additional additives like salt or seasoning) and lower the bag into the bucket of water. Open side up out of the water, of course. Then you reach into the water to rub out any bubbles that may be caught. Sort of like massaging the air out.
 After you have as much air out of the bag as you can, then you use a zip tie to seal the bag.
You don’t have to worry about getting every little bit of air out of the bag. Just as much as you are able to. The bag itself allows air to come in and out to create the perfect environment to dry age.
Make sure the zip tie is nice and tight. Dry off any excess water and the bagged strip loin is ready to go into the refrigerator.
Refrigerate The Strip Loin for 28+ Days
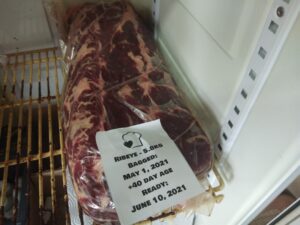
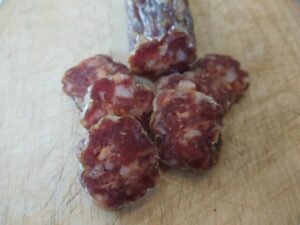
 Place the bagged strip loin (or whatever primal cut you have) in the refrigerator. You see it’s on the same shelf as my Salami. You can see that blog on maiking the salami by clicking here. The meat is on a grid in a pan to allow for air circulation on both sides.
I later just laid the bag on the refrigerator wire rack and the pan underneath the rack to catch any drippings. This allowed for more area for the air to circulate.
Every other day, I flipped the bag. As the days pass, you can see a few pockets of air growing. No need to be concerned about this. Remember, these bags are not air tight. Air will go into and out of the bags.
Now we just wait… and wait… and wait. But trust me, the wait is worth it.
After 28 Days of Aging
 28 days is the MINIMUM you want to dry age. At 28 days, the meat is at it’s tender peak and you get a taste of the dry age flavoring.
After 28 days, you get more of that flavor. Then it becomes a personal choice. I’ve read of people aging for a YEAR. This is a bit too much for me. I may try 45 days next time.
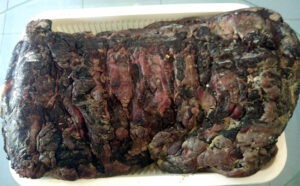
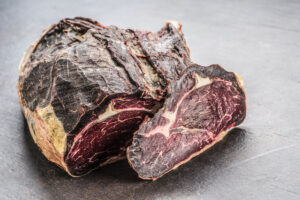
As we take the Strip Loin out, you can see the Pellicle, more commonly known as the Bark. At 28 days, the bark has completely encased the strip loin and it’s ready to create the New York Strip steaks.
Unbagging the Strip Loin
 The first thing you want to do is cut the zip tie off without puncturing the bag if you want to use the bag again.
The bag will be slightly sticking to the bark. So you run your hand inside the bag to pull the bag away from the bark. This will allow the meat to slip out of the bag easily.
You will also get the first smell of the meat. This is the dry age smell that tells you that it was a success. Dry aged beef does indeed smell different – strong beefy and some call it an earthy smell, others say a nutty smell while others say it has a musty smell like that of expensive bleu cheese. You are ready to start trimming.
Trimming Your Primal Cuts into Steaks
 Now we are ready to cut the primal into steaks and trim off the bark. The standard cut is 4cm/1.5in.
Instead of cutting the bark off first, we want to cut the meat into steaks and then trim the bark off. This is an easier process but it’s also a preference. Which ever order you choose, the bark comes off.
For the Strip Loin, most of the fat layer on top is taken off. Meat is taken off on the other sides of the steak but that is a minimum amount.
The Steak and the Bark
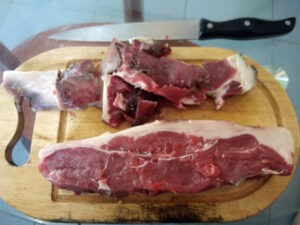 After we cut the meat into steaks, we trim the bark away. You have 2 different products. The Steak (bottom) and the Bark (top).
You can visually see the difference in the steak compared to non-aged steak. The meat is a deeper color and the marbling is more pronounced.
There’s always a debate on what you can do with the bark. Some say throw it away. Others say make an amazing broth.
Me, I have other plans…
The Bark for the Barker
 One of the best treats you can give your dog is the bark.
I like to cut it up to bite size pieces and place them in zip lock bags. Keep one of the bags in the refrigerator and the other bags in the freezer.
You dog would love you for it.
Many “experts” just say to throw it away. Others claims that grinding it with ground beef makes amazing burgers.
Still others says this makes the BEST au jus to use with your steak. This is yet another personal preference to research yourself to see what you like.
From Strip Loin to New York Strip Steaks
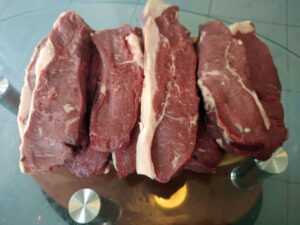 From the 6.2 kilograms of strip loin I got at the market, I ended up with 9 4cm cuts of New York Strip steaks.
In additional, I have about a kilogram of bark that my dog absolutely goes nuts over.
These steaks are perfect for BBQs. But I choose to reverse sear the first steak.
The total cost for making these steaks are 1,426 baht for the Strip Loin + 399 baht for the dry again bag = 1,825 baht total. Divide that by the 9 steaks and that comes out to about 200 baht for a huge dry aged New York Strip. And dog treats are thrown in for free!
Pretty sweet deal!
Now to Cook your Steak by Reverse Searing
Reverse searing is a method to get the most of your steak. Many equate this with a sous vide machine but that’s not needed. Being in Thailand, I don’t even have a proper western style oven. Just a larger toaster-oven. This worked just fine. Reverse searing is basically slowly raising the internal temperature to a certain degree and then sear all sides of the steak. Details on how this works can be FOUND HERE.
It’s All About Temperature
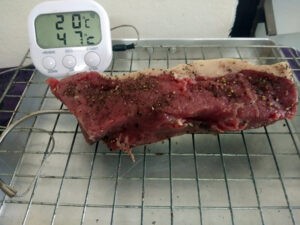
This is where you add your seasoning. Salt and Pepper. I use my cheese salt and my coarsely ground black pepper. Liberally sprinkle the entire steak.
With reverse searing, Temperature counts. The first thing you need is a meat thermometer. This can be a remote wired thermometer as I have, or an instant thermometer that you can check in on your steak from time to time.
I have a wired remote. The probe is firmly placed deep into the center of the steak. The wire is ran outside the oven and on top to keep an eye out.
You can also use a high tech blue tooth probe that you can monitor with your phone while watching TV on the couch.
Place on a wire rack over a drip pan and into the over it goes.
Set Your Target Temperature
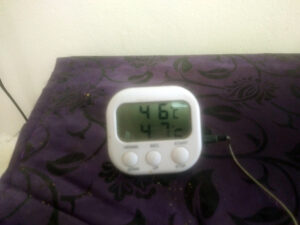 For myself, I prefer a medium rare steak. So the pre-sear steak temperature would be 46c/115f.
Other target temperatures would be 40c for rare, 52c for medium, and 57 for medium-well.
You set your oven at a low 120c for a slow cook. To get to our initial target internal temperature, it took 25 minutes.
Now you wait for the initial internal cooking to be complete.
After it has reached the target temperature, time to take it out and sear it.
Searing the Steak
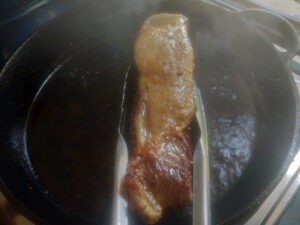 The steak is ready for the final stage. I love my cast iron skillet for it’s even temperature and the heat it can withstand.
I coat the pan with a thin layer of olive oil and a nice chunk of butter over the highest heat you can do.
Sear each side of the steak for 45-60 seconds. All sides including the edges. Get a nice browning on the steak.
After you have seared the steak, it’s time to let it rest for 5 minutes to let it finish cooking.
Reaching The Final Target Temperature
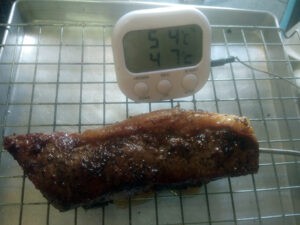 After searing and the final 5 minute rest, like magic, the final target temperature for a medium-rare steak of 54c is reached. PERFECT!
I’m not sure how this happens to the exact degree, but the experts of reverse searing has it spot on.
Your steak is perfectly cooked, beautifully browned, and ready to eat.
Now comes the final taste test.
Time to Enjoy Your Dry Aged Steak
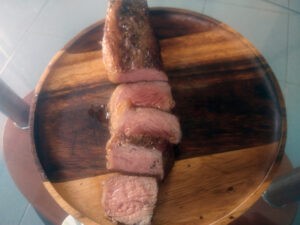 This is what a medium rare New York Strip is suppose to look like.
Slightly pink in the middle and seared on the out side.
This Thai beef I got from the local market that was once super tough and flavorless is now tender and bursting with flavor.
If I had a butter knife, I could have used it with this steak. And usually, when I have a steak, I use a steak sauce. This had so much flavor, no steak sauce was needed at all.
So what are you waiting for? Time to enjoy steaks again in your home. It’s easy to do, tastes better than imported steaks, and you save a ton of money.

Add comment
You must be logged in to post a comment.