
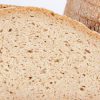
Basic White Sourdough Recipe
Wonderful and Tasteful White Sourdough

White Sourdough
This white sourdough bread recipe will produce about 2 to 2.2 kg of dough. This will be enough dough for 2 common sized bread tins to be about half filled. This white sourdough recipe doesn’t rise as much as yeasted bread, but it should fill your tins nicely when risen and baked.
Ingredients
- 300 g Fresh Sourdough Starter
- 1.2 kg White Flour
- 600 ml Bottled Water (luke warm)
- 24g Coarse Salt
Mixing in flour
In your plastic box or mixing bowl, pour in the flour. Make a well in the middle, and pour in the water – start with about half, and then add most of the rest. Keep a little reserved, to be used if the dough feels too tough when it comes together. Put the starter in the well of water and squelch it so it mixes with the liquid.
Mixing dough with one hand
Using one hand only, mix all the ingredients together roughly. I go for a circular motion, using my whole hand. This causes the flour to fall into line quite naturally. You don’t need to knead – what you’re after at this stage is just a fairly loose dough. Lumps are OK – this method actually allows chemistry to do the work for you.
If you can manage keeping one hand clean, you’ll find that cleaning up afterwards is much easier. You may need to add some more water as you go, if the dough feels too thick or tight (remember to just use one hand if you can – when you do stuff like turn on and off taps, open cupboards etc with doughy hands, you’ll soon discover just how quickly dough gets onto everything! The distribution of small fragments of dough through your kitchen makes being a domestic baker quite a chore, so I do what I can to keep it tidy as I go).
Dough before salt
Make sure that the dough has absorbed all the flour and all the water before you leave it to rest. Once this has been achieved, put the lid on and leave it for about an hour. This method is known as the delayed salt method.
Salt on dough before kneading
After about an hour, sprinkle the salt over the dough. Knead it through, still using one hand until the dough comes together. You’ll be amazed at how smooth the dough quickly becomes – in no time at all you should get a ball, like in the next picture. By using the delayed salt method, we have assisted the formation of gluten strands. Now, by kneading, these strands become sheets of gluten, separated by water – which are all the better to play with and make shapes!
Don’t worry about trying to get it perfect – as long as the salt is not all over the outside of the dough, it’ll be fine. Once it starts to come together, you can use both hands. Now you’ll find the dough is easy to remove from your hands too, because gluten has begun to form.
First Proofing
Leave the dough to rest in the bowl with the lid or plastic wrap on for about 5 to 8 hours.(If your sourdough starter is not active, this may take longer – sometimes after twelve hours there isn’t much action.) You would like the dough to have doubled in size during this time, but this is not always possible. But it will have filled out quite a lot, and will be very ‘slack’ if you poke it. It will need to be quite soft when you come to cut.
Second Proofing
Divided and rounded dough
When it’s ready, take it out of the box and divide it in two. This is where the stainless steel dough scraper comes in handy. You can get this roughly correct by eye, and just use your scales to adjust, cutting small pieces of dough from the bigger ball and putting them on the smaller one.
Take each piece and round it by hand with the seam at the bottom. Place at either end of the plastic box so they don’t merge in the ‘intermediate proofing’ stage(this is the baker’s term for what you’re currently setting up). Put the lid back on and leave the rounded balls of dough to recover.
In warm weather, this will only take about half an hour. If it’s cooler, this could take an hour. Just enough to feel soft.
Form into cylinders
Now take them out of the box and place them on the bench, still with the seam at the bottom. Take one, turn it over, and flatten it out a bit, till it’s about an inch thick. Now roll it into a cylinder, remembering to keep the seam heading into the middle of the dough. At this point I put them back into their box for a quick rest while I’m preparing the tins for them to go into.
This will create a nice smooth outer surface. Once you have a cylinder, do the next one in the same way. Always return them to the bench with the seam you’ve created on the bottom, so you can’t see it.
Dusted, slashed and ready for their tins
Spray or wipe some water on the molded cylinders, take your sieve and scoop some flour into it, and dust lightly over the top. Now put a few parallel diagonal slashes into the dough – quite deep. Pick up from underneath and place in your oiled tins.
If your tins are the right size, the dough should occupy about three quarters of the space. This will allow them to eventually rise above the top of the tins, making a very pleasing looking loaf.
Final Proofing
Dough bowl becomes proofer
Put the tins back in your dough box and return the lid. If your bowl is large enough, you can turn it upside down, put your tins on the lid, and place the base of the bowl over the top.
No skinning this way!
Once inside this container, you’ve prevented the formed and tinned dough from skinning, and you’ve also created a mini proofer, which will prevent the dough from crusting and thus proof more quickly.
Baking your White Sourdough Loaf
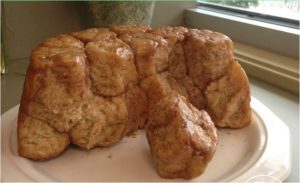
Once they have risen to fully fill the tin or baking sheet, turn on your oven. My default setting is 180 degrees centigrade for two loaves. This depends on the type of oven you have, and the volume you want to bake in it. You might want to lower this by about 20 degrees for a fan forced oven.
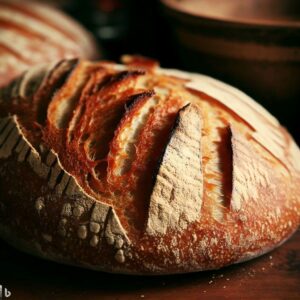
Depending on how successfully you’ve been able to set up your oven from the paragraph above, these loaves should bake in about an hour or less. I go for a light golden crust, though you may want to go for ‘thickness’ of crust. If this is the case, wind your oven down by ten degrees and bake for an extra fifteen minutes. The longer the baking time, the thicker the crust. Reducing oven temperature will allow you to bake longer for a thicker, more colored crust.
A sharp tap on the side of the loaf with your finger will indicate whether it’s baked – a hollow sound will be produced if it is – whereupon remove the tin and place the bread on a rack to cool. If it isn’t baked, a sort of thud will sound, and another 10 or 15 minutes in the oven will get you there.
So that’s it – the Basic White Sourdough Recipe.


Add comment
You must be logged in to post a comment.