Colby Cheese – An American Original
Colby Cheese – The Original American Cheese
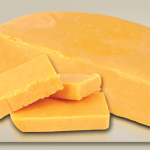
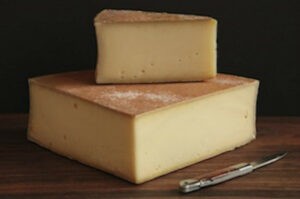
Colby cheese is considered to be one of the first truly American cheeses, since it was developed by an American in the United States, and it was not intended to be an imitation of a European cheese.
Colby cheese is NOT a young cheddar. Today’s Colby is similar in flavor to cheddar but is softer, has a more open texture, and is higher in moisture. The curd is washed in cold spring water which prevents them from knitting together and gives it a more open elastic texture and a sweeter flavor than any cheddar.
[embedyt] http://www.youtube.com/watch?v=i9CbAAB2xvs[/embedyt]
Colby Cheese
- 2 gallons Whole Milk (Not UltraPasteurized)
- 1/2 Packet Mesophilic Culture (- <a href="http://thaiartisanfoods.com/shop/mesophilic-culture/" target="_blank">Buy Here</a>)
- 1/4 Tsp Calcium Chloride ( – <a href="http://thaiartisanfoods.com/shop/calcium-chloride/" target="_blank">Buy Here</a>)
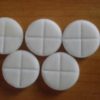
- 1/4 tablet Rennet (dissolved in 1/4 cup cool water – <a href="http://thaiartisanfoods.com/shop/rennet-5-tablets/" target="_blank">Buy Here</a>)
- 1/4 Tsp Cheese Coloring (Optional)
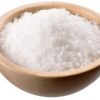
- 2 lbs Cheese Salt (- <a href="http://thaiartisanfoods.com/shop/cheese-salt/" target="_blank">Buy Here</a>)
- Heating and Acidifying the Milk: Begin by heating the milk to 86F (30C). You do this by placing the milk in a pot or sink of very warm water. If you do this in a pot on the stove make sure you heat the milk slowly and stir it well as it heats. Next the Calcium Chloride and cheese coloring (optional) can be added before adding the culture. Once the milk is at your start temperature the mesophilic culture can be added. To prevent the powder from caking and sinking in clumps sprinkle the powder over the surface of the milk and then allow about 2 minutes for the powder to re-hydrate before stirring it in.
- Coagulation with Rennet: Add 1/2 tsp (2.5ml) of single strength liquid rennet. The milk now needs to sit quiet for 45 minutes while the culture works and the rennet coagulates the curd . The thermal mass of this milk should keep it warm during this period. It is OK if the temp drops a few degrees during this time.
- At about 15 minutes you should notice the milk beginning to firm up. Allow it to remain quiet for another half hour for a curd ready to cut. This will be a total of 45 minutes from rennet addition to cut. If your curd does not seem firm enough then allow it to rest another 10 minutes before cutting.
- Cutting the Curd and Releasing the Whey: The curd is ready to cut when it shows a nice clean even break when lifting with the flat of the cutting knife and then a clean whey in the opening that is neither to milky (cut too soon) or too clear (cut too late). The curd can be cut to 1/2″ cubes by first cutting the 1/2″ vertical cuts as shown below and then using the ladle or spoon to break these into 1/2″ pieces as uniformly as possible.
- Cooking the Curds: Now it is time to begin drying out the curds. This will be done by increasing the heat slowly to 102F . The heat needs to be increased slowly. The total cooking time will be 30 minutes. The curds can then be gently stirred while holding at the final temperature for another 15-30 minutes if the curds are still soft. The final curds should be cooked well through and should be examined to make sure that enough moisture has been removed. A broken curd should be firm throughout and the curds should have a moderate resistance when pressed between the fingers. This is a fairly subjective test (depending on how firm/soft you want the final cheese.)
- Washing the Curds: This is one of the key parts in making this cheese a real Colby cheese. Begin by removing the whey down to the level of the curds. Placing a Colander Into the Pot will Make it Easier to Remove the Whey While Keeping the Curds in the Pot. Next add very cold water (60F or less) until the curds are at 75-80F. The curd can now be stirred in its cooler state for another 15 -30 minutes as the curds begin to firm up. This will cause the curds to form a skin that will keep them from consolidating fully in the press, leaving some small openings in the final cheese.
- Final Draining and Molding: The dry curds can now be transferred to a colander lined with butter muslin. A gentle stirring will make sure that the whey drains off well. The curds are now ready to be transferred to a sanitized muslin lined mold.
- Pressing: The curds in the form are now still quite wet and heavy pressure early on may lock this moisture in the final cheese. Even though we have slowed down the conversion of lactose to lactic acid, we are still producing acid and will continue this during the final pressing. This means that the cheese will continue to release moisture through the pressing as a bit more acid is present. For pressing we should begin very light and slowly increase the press weight to a moderate level:
•15 minutes at 10 lbs.
•30 minutes at 20 lbs
•90 minutes at 40 lbs
•Overnight at 50 lbs. - Salting: You should have a saturated brine prepared for salting this cheese. A simple brine formula is: 1 Gallon of water to which is added 2 Lbs of Salt, 1tbs. Calcium Chloride (30% solution), and 1 tsp. white vinegar. The cheese now needs to be set in the brine for about 8 hours. At the end of the brine bath, wipe the surface and allow the cheese to surface dry for a day or two before waxing. The surface will darken somewhat during this time.
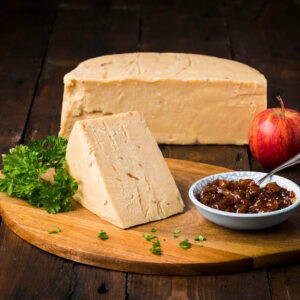
- Aging: The cheese can now be waxed for aging. The cheese can then be placed into your aging space at 52-56F and 80-85% moisture. The cheese can now be aged for 4-6 weeks and it will ready for your table.




Add comment
You must be logged in to post a comment.